自动替换 Kubernetes 镜像
前几天有朋友在问如何在某云上拉取 Tekton 的镜像,这种情况其实比较普遍不只是某云。工作中经常要用到过某些靠运气才能拉取到的镜像,这对工作来说真是极度的不友好。
因此也萌生了个想法,维护一个后网络友好的仓库镜像,在 Pod 创建时将镜像仓库切换到自维护的仓库,从自维护的仓库拉取镜像。
前几天体验了极狐Gitlab 的容器镜像库,便是为这个想法做的准备。当然其他的云厂商也有提供针对个人版的免费镜像仓库和企业版仓库。
正好 Pipy 作为策略引擎,非常适合实现这种策略的执行。

实现思路

Admission Webhook
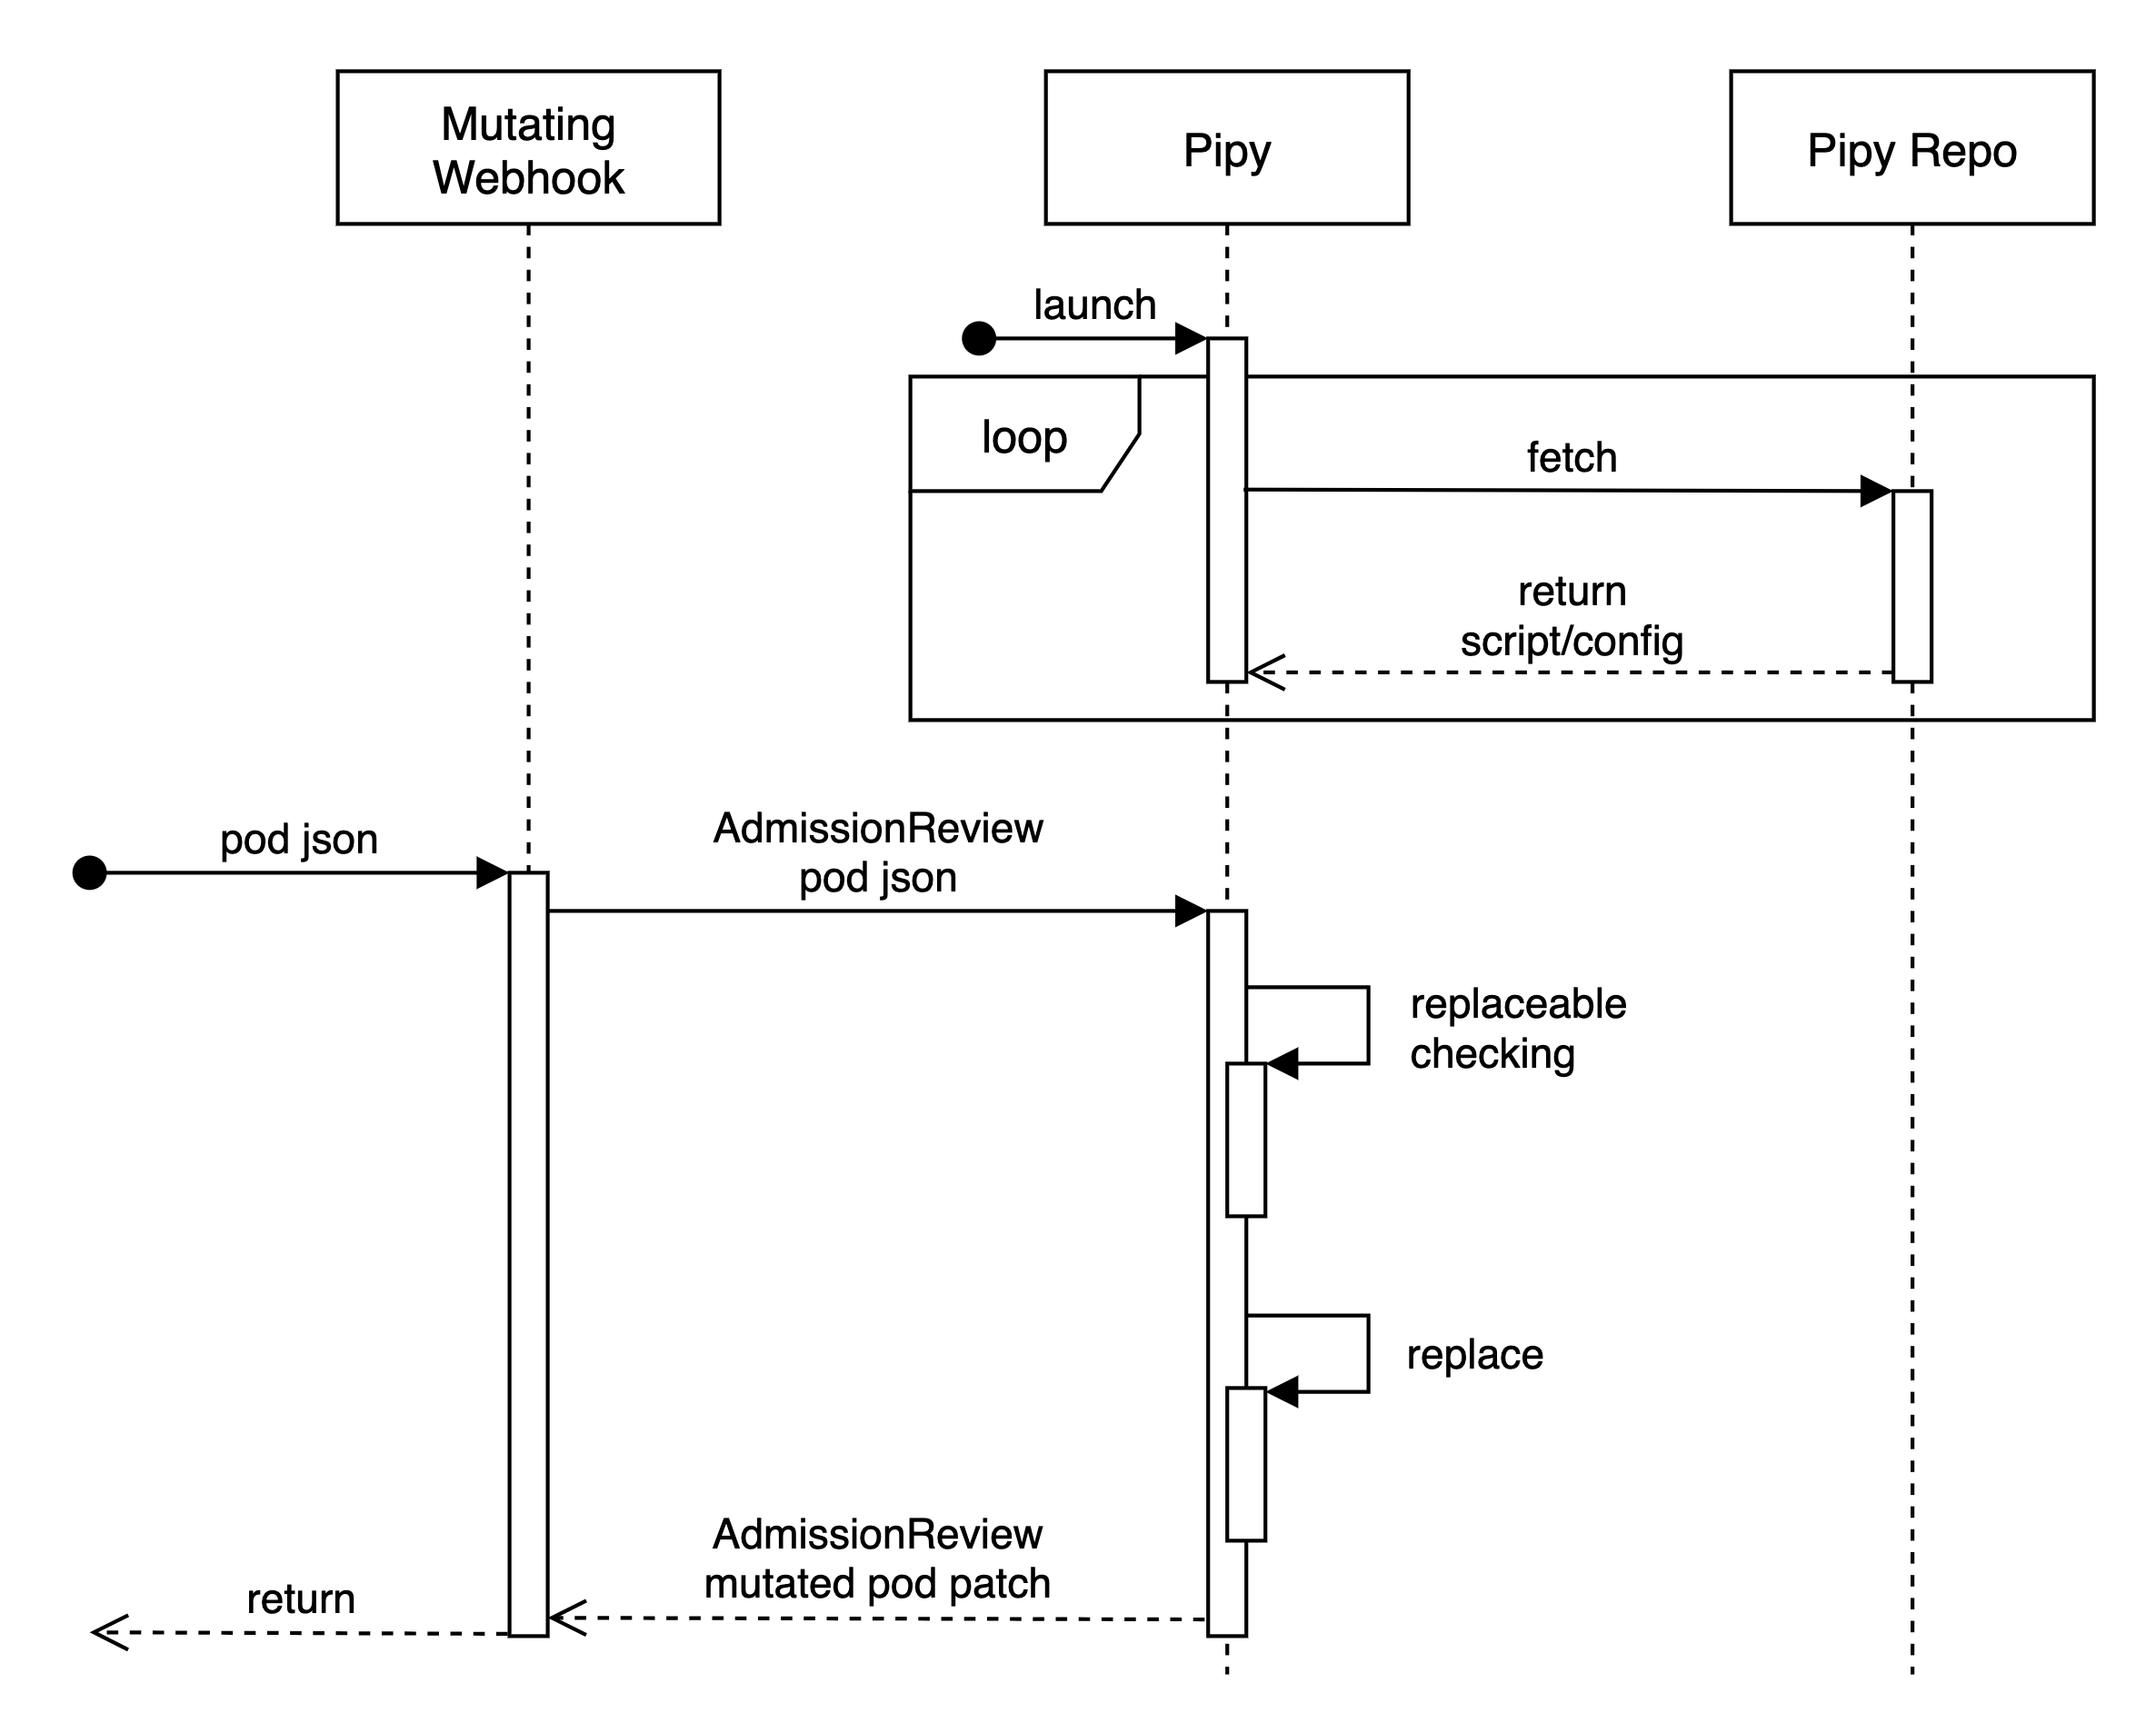
Kubernetes 动态准备控制 的 MutatingWebhookConfiguration 可以 hook Pod 的创建或者更新,然后调用目标服务对 Pod 资源对象进行 patch 操作。
策略引擎
Pipy 作为应用的核心,也就是 MutatingWebhookConfiguration 的目标服务,以策略引擎的角色完成策略的执行。
Pipy 支持从文件或者 HTTP 地址加载脚本,这里为了便于策略的更新,使用了后者。
对于从 HTTP 地址加载脚本,HTTP 地址返回内容的第一行会作为 Pipy 的主脚本,Pipy 启动时会加载主脚本,其他的文件也会被缓存到内存中。
#地址 http://localhost:6080/repo/registry-mirror/
$ curl http://localhost:6080/repo/registry-mirror/
/main.js
/config.json
Pipy 会每隔 5s 检查脚本和配置文件的 etag(就是文件的最后更新时间),假如与当前文件的 etag 不一致,则会缓存并重新加载。
利用 Pipy 的这个特性,便可以策略和配置的准实时更新。
策略
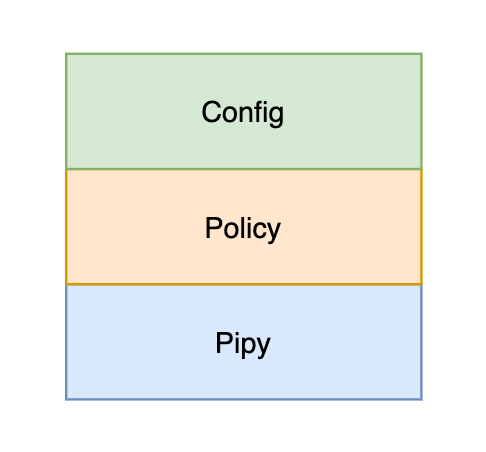
对于策略的部分,我们将其逻辑和配置进行了分离。配置部分,配置了需要进行替换的镜像的前缀,以及替换成的内容;而逻辑,这是对 MutatingWebhookConfiguration 的 AdmissionReview 的对象进行检查。
配置:
{
  "registries": {
    "gcr.io/tekton-releases/github.com/tektoncd/pipeline/cmd": "registry.gitlab.cn/flomesh/registry-mirror/tekton-pipeline"
  }
}
比如说,对于镜像 gcr.io/tekton-releases/github.com/tektoncd/pipeline/cmd/controller:v0.28.1,将 gcr.io/tekton-releases/github.com/tektoncd/pipeline/cmd 替换成 registry.gitlab.cn/addozhang/registry-mirror/tekton-pipeline。
Demo
本文使用所有的源码都已上传到了 github。
脚本服务器
既然选用了 HTTP 方式加载 Pipy 的脚本,那就需要实现一个脚本服务器。实现的方式有两种:使用脚本实现脚本服务器和使用 Pipy 内置的 Codebase。
使用脚本实现脚本服务器
根据需求定义两种路由:
/repo/registry-mirror/:返回脚本和配置的文件列表/repo/registry-mirror/[File Name]:返回对应的文件的内容,同时需要在响应头添加etag,值是文件的更新时间
具体脚本如下:
#repo.js
pipy({
  _serveFile: (req, type, filename) => (
    filename = req.head.path.substring(22),
    os.stat(filename) ? (
      new Message(
        {
          bodiless: req.head.method === 'HEAD',
          headers: {
            'etag': os.stat(filename)?.mtime | 0,
            'content-type': type,
          },
        },
        req.head.method === 'HEAD' ? null : os.readFile(filename),
      )
    ) : (
      new Message({ status: 404 }, `file ${filename} not found`)
    )
  ),
  _router: new algo.URLRouter({
    '/repo/registry-mirror/': () => new Message('/main.js\n/config.json'),
    '/repo/registry-mirror/*': req => _serveFile(req, 'text/plain')
  }),
})
  .listen(6080)
  .serveHTTP(
    req => _router.find(req.head.path)(req)
  )%
$ pipy repo.js
2021-10-05 21:40:25 [info] [config]
2021-10-05 21:40:25 [info] [config] Module /repo.js
2021-10-05 21:40:25 [info] [config] ===============
2021-10-05 21:40:25 [info] [config]
2021-10-05 21:40:25 [info] [config]  [Listen on :::6080]
2021-10-05 21:40:25 [info] [config]  ----->|
2021-10-05 21:40:25 [info] [config]        |
2021-10-05 21:40:25 [info] [config]       serveHTTP
2021-10-05 21:40:25 [info] [config]        |
2021-10-05 21:40:25 [info] [config]  <-----|
2021-10-05 21:40:25 [info] [config]
2021-10-05 21:40:25 [info] [listener] Listening on port 6080 at ::
检查路由:
$ curl http://localhost:6080/repo/registry-mirror/
/main.js
/config.json

$ curl http://localhost:6080/repo/registry-mirror/main.js
#省略 main.js 的内容
$ curl http://localhost:6080/repo/registry-mirror/config.json
#省略 config.json 的内容
使用 Pipy 内置的 Codebase
在最新发布的 Pipy 内置了一个 Codebase,大家可以理解成脚本仓库,但是比单纯的仓库功能更加强大(后面会有文档介绍该特性)。
目前版本的 Codebase 还未支持持久化的存储,数据都是保存在内存中。后续会提供 KV store 或者 git 类型的持久化支持。
启动 Pipy 的 Codebase很简单:
$ pipy
2021-10-05 21:49:08 [info] [codebase] Starting codebase service...
2021-10-05 21:49:08 [info] [listener] Listening on port 6060 at ::

对于新的 Codebase 控制台的使用,这里不做过多的介绍,直接使用 REST API 完成脚本的写入:
#创建 registry-mirror codebase,会自动创建一个空的 main.js
$ curl -X POST http://localhost:6060/api/v1/repo/registry-mirror
#更新 main.js
$ curl -X POST 'http://localhost:6060/api/v1/repo/registry-mirror/main.js' --data-binary '@scripts/main.js'
#创建 config.json
$ curl -X POST 'http://localhost:6060/api/v1/repo/registry-mirror/config.json' --data-binary '@scripts/config.json'
#检查 codebase 的版本
$ curl -s http://localhost:6060/api/v1/repo/registry-mirror | jq -r .version
#更新版本
$ curl -X POST 'http://localhost:6060/api/v1/repo/registry-mirror' --data-raw '{"version":2}'
安装
进入到项目的根目录中,执行:
$ helm install registry-mirror ./registry-mirror -n default
NAME: registry-mirror
LAST DEPLOYED: Tue Oct  5 22:19:26 2021
NAMESPACE: default
STATUS: deployed
REVISION: 1
TEST SUITE: None
查看 webhook:
$ kubectl get mutatingwebhookconfigurations
NAME                      WEBHOOKS   AGE
registry-mirror-webhook   1          2m6s
检查 pod 的启动日志:
$ kubectl logs -n pipy -l app=pipy
2021-10-05 14:19:28 [info] [codebase] GET http://192.168.1.101:6060/repo/registry-mirror/ -> 21 bytes
2021-10-05 14:19:28 [info] [codebase] GET /repo/registry-mirror/main.js -> 2213 bytes
2021-10-05 14:19:28 [info] [codebase] GET /repo/registry-mirror/config.json -> 149 bytes
2021-10-05 14:19:28 [info] [config]
2021-10-05 14:19:28 [info] [config] Module /main.js
2021-10-05 14:19:28 [info] [config] ===============
2021-10-05 14:19:28 [info] [config]
2021-10-05 14:19:28 [info] [config]  [Listen on :::6443]
2021-10-05 14:19:28 [info] [config]  ----->|
2021-10-05 14:19:28 [info] [config]        |
2021-10-05 14:19:28 [info] [config]       acceptTLS
2021-10-05 14:19:28 [info] [config]        |
2021-10-05 14:19:28 [info] [config]        |--> [tls-offloaded]
2021-10-05 14:19:28 [info] [config]              decodeHTTPRequest
2021-10-05 14:19:28 [info] [config]              replaceMessage
2021-10-05 14:19:28 [info] [config]              encodeHTTPResponse -->|
2021-10-05 14:19:28 [info] [config]                                    |
2021-10-05 14:19:28 [info] [config]  <---------------------------------|
2021-10-05 14:19:28 [info] [config]
2021-10-05 14:19:28 [info] [listener] Listening on port 6443 at ::
测试
在上一篇中我已经推送了 Tekton 的两个镜像到容器镜像库中,因此这里直接安装 tekton 进行测试。
$ kubectl apply --filename https://storage.googleapis.com/tekton-releases/pipeline/previous/v0.28.1/release.yaml

$ kubectl get pod -n tekton-pipelines
NAME                                           READY   STATUS    RESTARTS   AGE
tekton-pipelines-controller-75974fbfb8-f62dv   1/1     Running   0          7m36s
tekton-pipelines-webhook-6cc478f7ff-mm5l9      1/1     Running   0          7m36s
检查结果:
$ kubectl get pod -o json -n tekton-pipelines -l app=tekton-pipelines-controller | jq -r '.items[].spec.containers[].image'
registry.gitlab.cn/flomesh/registry-mirror/tekton-pipeline/controller:v0.28.1

$ kubectl get pod -o json -n tekton-pipelines -l app=tekton-pipelines-webhook | jq -r '.items[].spec.containers[].image'
registry.gitlab.cn/flomesh/registry-mirror/tekton-pipeline/webhook:v0.28.1
从上面的结果可以看到结果是符合预期的。
总结
整个实现的策略部分加上配置,只有 70 多行的代码。并且实现了逻辑与配置的分离之后,后续的配置也都可以做到实时的更新而无需修改任何逻辑代码,更无需重新部署。
但是目前的实现,是需要手动把镜像推送的自维护的镜像仓库中。实际上理想的情况是检查自维护的仓库中是否存在镜像(比如通过 REST API),如果未发现镜像,先把镜像拉取到本地,tag 后再推送到自维护的仓库。不过这种操作,还是需要网络的畅通。当然也尝试过通过 REST API 触发 CICD Pipeline 的执行拉取镜像并 tag,但是极狐Gitlab 是部署在某云的环境上,同样也受困于网络问题。
