Jenkins 如何与 Kubernetes 集群的 Tekton Pipeline 交互?
本文详细介绍了 Jenkins 如何通过 tekton-client-plugin 实现与 Kubernetes 上的 Tekton Pipeline 交互,包括 Kubernetes 上安装 Jenkins、Tekton Pipelines 等。
关于如何使用 Tekton Pipeline 实现 CICD 可以看这篇文章 云原生 CICD: Tekton Pipeline 实战
本文用于构建的项目以及所有 manifest yaml 都在可以在这里下载。
TL;DR
惯例,先上总结。tekton-client-plugin 虽然还是处于初期阶段,但是 其价值非常明显,尤其是对先用使用 Jenkins 作为 CICD 实现的用户来说。从 Jenkins 迁移到云原生的 Tekton 时,可以省掉用户界面的开发成本,而且尽可能少的改变用户习惯 ,依靠版本管理可以控制迁移的节奏。
tekton-client-plugin 在今年 5 月 7 日发布的 1.0.0 版本,目前为 1.0.02。目前还处于初期阶段,我个人感觉目前仅仅算是打通 Jenkins 与 Tekton 交互这条路,扩展性还不够好。
比如目前仅仅支持如下几个参数注入到 PipelineRun 中,难以支撑复杂的流程控制,支持的 Pipeline 参数 hardcode 在代码中。
- BUILD_ID - the build id/number of the Jenkins job
- JOB_NAME - the name of the jenkins job that triggered this pipeline
- PULL_BASE_REF - name of the base branch
- PULL_PULL_SHA - the commit sha of the pull request or branch
- REPO_NAME - name of the repository
- REPO_OWNER - owner of the repository
- REPO_URL - the URL of the repository
希望后面会支持自定义参数,比如将更多的项目元数据信息注册到 Pipeline 中。
值得一提的是,tekton-client-plugin 提供了对 Job DSL 的支持,本文后面没有用这种方式,而是用的 FreeStyle Project。
pipeline {
  agent any
  stages {
    stage('Stage') {
      steps {
        checkout scm
        tektonCreateRaw(inputType: 'FILE', input: '.tekton/pipeline.yaml')
      }
    }
  }
}
前置条件
环境
- Kubernetes:推荐 minikube
- Jenkins:建议在 Kubernetes 上安装
- Tekton
- 用于构建的项目
工具
- kubectl
- tektoncd-cli
- kubectx、kubens
- helm
Kubernetes 上安装 Jenkins(Helm)
Jenkins 这里使用 Helm 安装到 Kubernetes 上。
初始化命名空间、持久化卷、ServiceAccount 等。
kubectl create namespace jenkins
kubens jenkins
# 持久化存储,笔者将容量修改为 5G
http https://raw.githubusercontent.com/jenkins-infra/jenkins.io/master/content/doc/tutorials/kubernetes/installing-jenkins-on-kubernetes/jenkins-volume.yaml  --body  > jenkins-volume.yaml
# 创建 PV
kubectl apply -f jenkins-volume.yaml
# 创建 service account
kubectl apply -f https://raw.githubusercontent.com/jenkins-infra/jenkins.io/master/content/doc/tutorials/kubernetes/installing-jenkins-on-kubernetes/jenkins-sa.yaml
准备 helm 环境并添加 Jenkins ChartRepo
# homebrew 安装 helm
brew install helm
# 添加 jenkins chart repo
helm repo add jenkinsci https://charts.jenkins.io
helm repo update
配置 Jenkins Chart
- 下载官方的 values yaml进行修改:
http https://raw.githubusercontent.com/jenkinsci/helm-charts/main/charts/jenkins/values.yaml > jenkins-values.yaml - 修改
serviceType为NodePort,并增加nodePort: 32000。用于从 minikube 外访问 Jenkins - 修改
storageClass为jenkins-pv。前面创建 PV 的时候使用了jenkins-pv作为 Dynamic Volume Provisioning 的storageClass - 修改
serviceAccount部分,将create设置为false(上面已经创建了serviceAccount),同时将name指定为前面的 sa 名字jenkins installPlugins下增加tekton-client:1.0.2- 修改
adminPassword为admin。指定初始密码(不指定也可以通过安装输出的说明获取初始密码) - 修改
persistence的size为5Gi(我的 minikube 的虚拟机只有 20Gi 大小)
修改后的文件在这里 jenkins-values.yaml。
执行安装
chart=jenkinsci/jenkins
helm install jenkins -n jenkins -f jenkins-values.yaml $chart
输出结果:
NAME: jenkins
LAST DEPLOYED: Sun Jun 20 22:05:53 2021
NAMESPACE: jenkins
STATUS: deployed
REVISION: 1
获取 Jenkins 的访问地址 echo $(minikube ip):$(kubectl get svc jenkins -o jsonpath="{.spec.ports[0].nodePort}"),然后使用前面设置的账号登录。
Tekton 安装
kubectl create ns tekton-pipelines
kubens tekton-pipelines
kubectl apply --filename https://storage.googleapis.com/tekton-releases/pipeline/latest/release.yaml
安装 CLI
brew install tektoncd-cli
RBAC
Tekton Pipeline 安装完成后,需要给前面创建的 ServiceAccount jenkins 增加 tekon 资源的操作权限。
//tekton-role.yaml
kind: Role
apiVersion: rbac.authorization.k8s.io/v1
metadata:
  name: tekton-role
  namespace: tekton-pipelines
rules:
  - apiGroups:
      - ""
    resources:
      - pods
      - pods/log
    verbs:
      - get
      - list
      - watch
  - apiGroups:
      - tekton.dev
    resources:
      - tasks
      - taskruns
      - pipelines
      - pipelineruns
    verbs:
      - create
      - delete
      - deletecollection
      - get
      - list
      - patch
      - update
      - watch
---
apiVersion: rbac.authorization.k8s.io/v1
kind: RoleBinding
metadata:
  name: tekton-role-binding
  namespace: tekton-pipelines
roleRef:
  apiGroup: rbac.authorization.k8s.io
  kind: Role
  name: tekton-role
subjects:
  - kind: ServiceAccount
    name: jenkins
    namespace: jenkins
Jenkins 与 Tekton 交互
前面大篇幅的都只是准备工作,Jenkins 安装时我们已经添加了 tekton-client-plugin 插件。
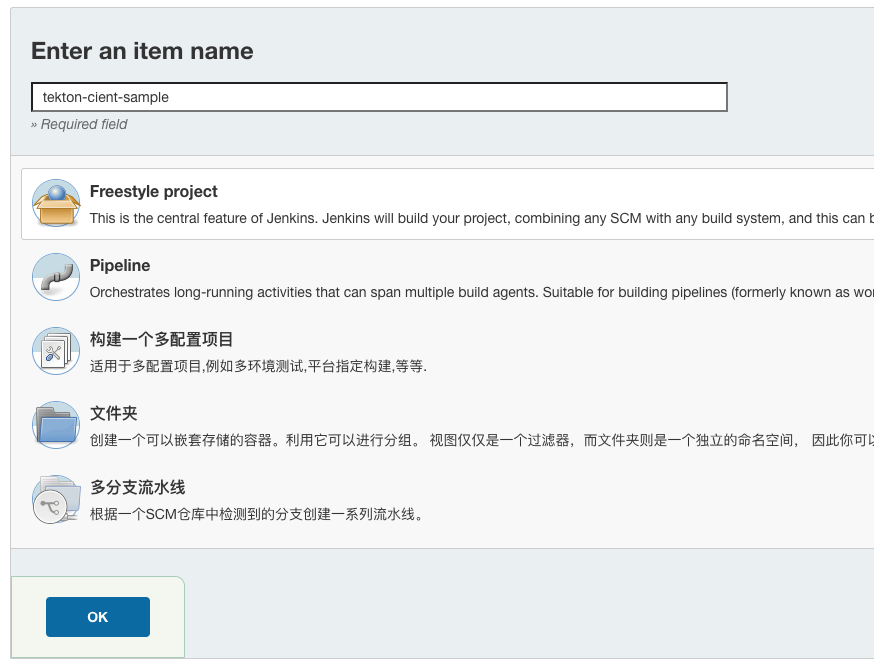
添加一个名为 tekton-client-sample 的 FreeStyle project。
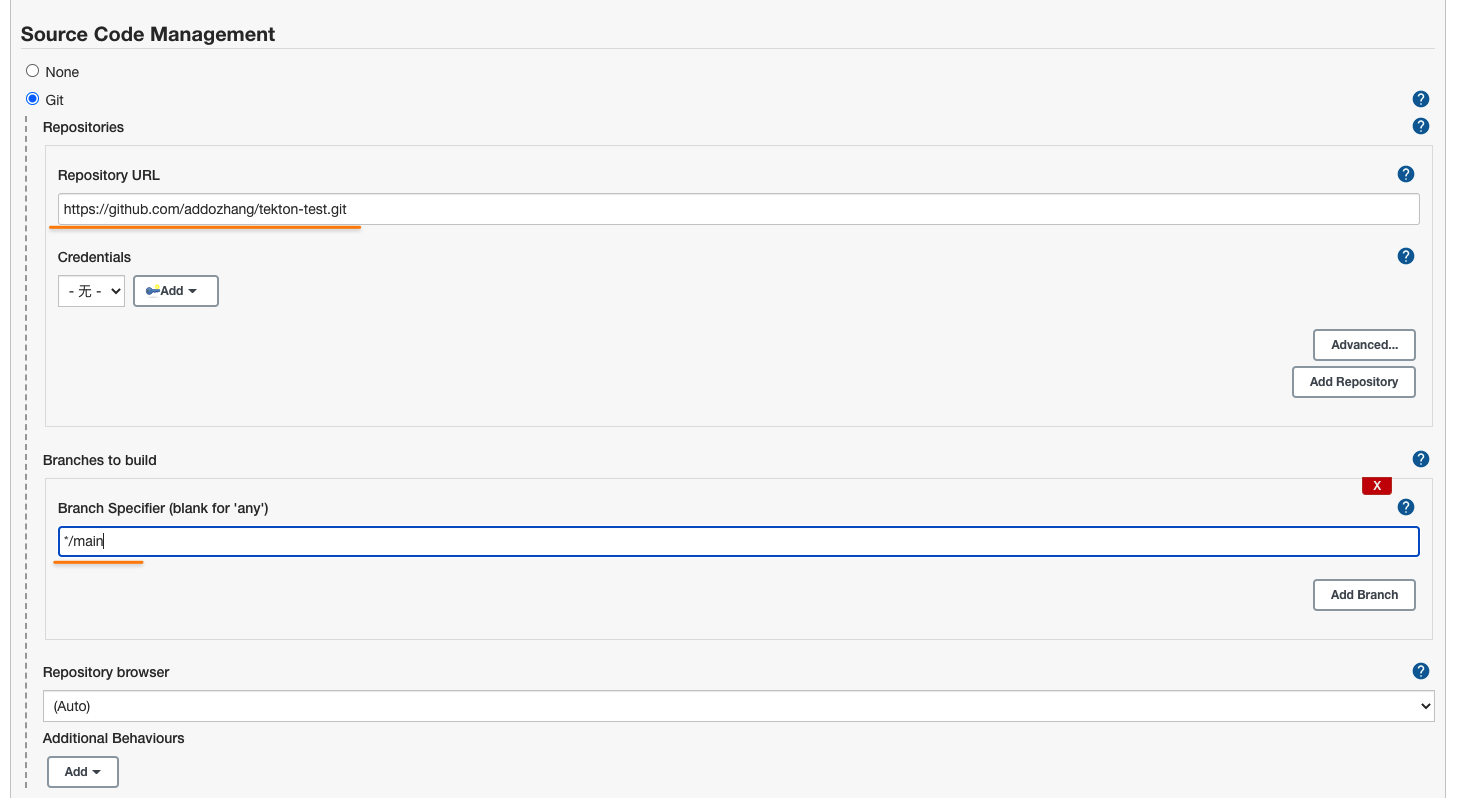
SCM 这里填入用于构建的项目仓库地址以及分支。
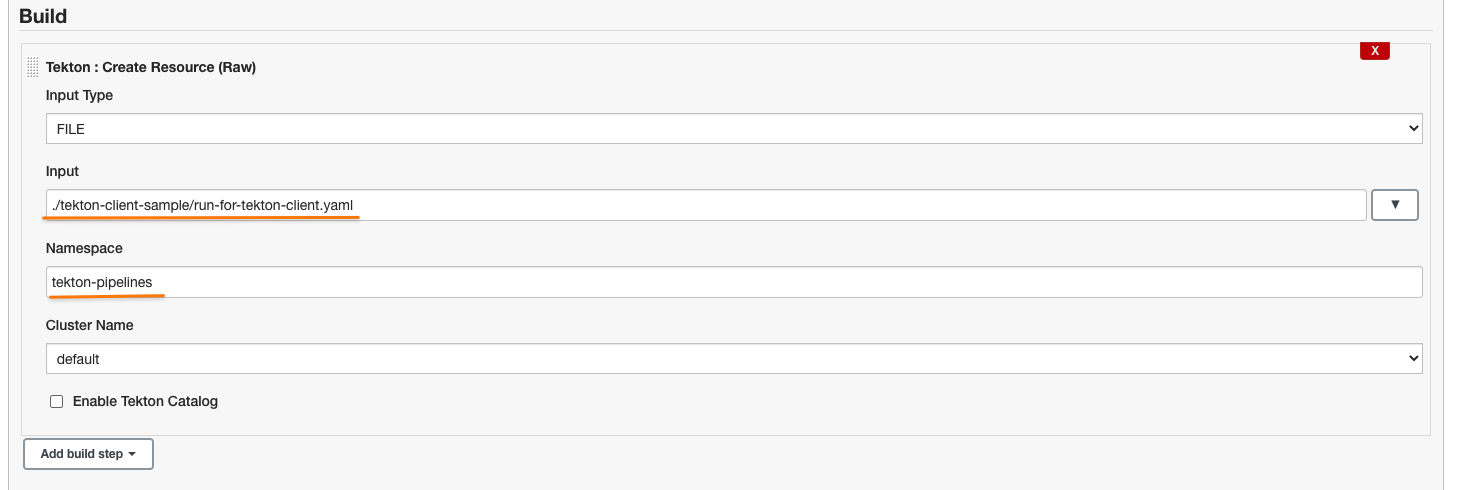
Build 模块中选择 Tekton: Create Resource (RAW)
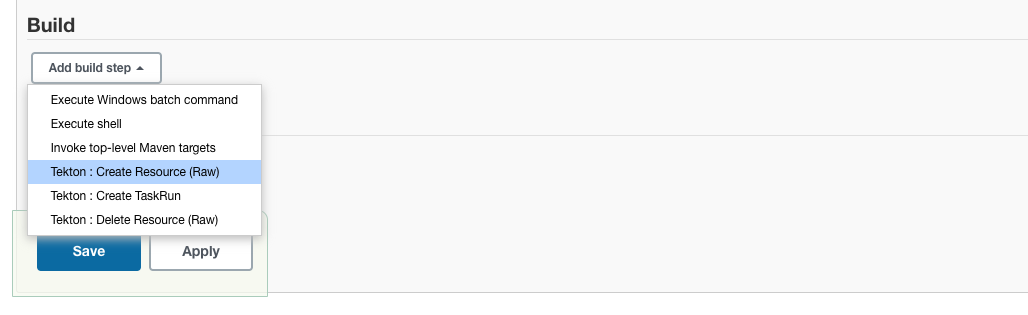
这里选择 FILE 类型,因为我已经将 PipelineRun 的 yaml 放进了代码仓库中了。
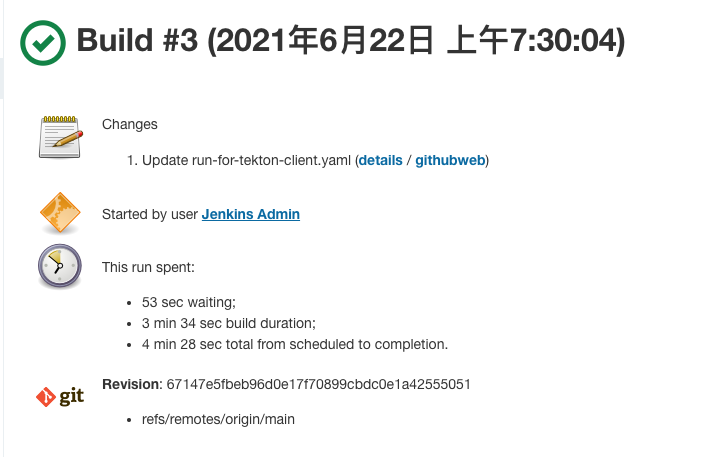
执行一次构建
检查下应用
$ kubectl get pod | grep tekton-test
tekton-test-75975dcc88-xkzb6                           1/1     Running     0          3m13s
tekton-test-c26lw-deploy-to-k8s-28trp-pod-w8tgc        0/1     Completed   0          3m18s
tekton-test-c26lw-fetch-from-git-pv66g-pod-nm5qh       0/1     Completed   0          6m30s
tekton-test-c26lw-source-to-image-k8mpg-pod-qh7g4      0/2     Completed   0          6m15s

$ curl $(minikube ip):$(kubectl get svc tekton-test -o jsonpath="{.spec.ports[0].nodePort}")/hi
hello world